|
|

|
Special Effects - The Moving, or Working miniature details that make a model seem even more realistic. Here you may discover something very simple, which will enhance your models and make them more interesting. And all these ideas easy to do, and easily installed - if space allows within your model or project without a lot of technical skills - required. ____________________________________________________________
Working - Bilge Pumps! for Fire Hoses & Nozzles Obviously, the key component = Is The Water Pump! Basically, nothing more than an After-Market - version, of 12 Volt Replacement - Windshield Washer Pump, converted to be used in this hobby. Ask your local Auto Parts Store for a replacement or aftermarket - WINDSHIELD WASHER PUMP? These units are fairly small - in size, about the size of a pack of cigarettes or smaller in some cases, depending upon the brand. And easily pump streams of water with plenty of pressure at 12 volts, sending streams - well over 20 feet, in some cases. And also ask for an in-line "Fuel Filter" used on small gasoline engines or Lawn Mowers. Because this item - is used to filter the water going into the pump, avoiding anything tiny debris from being sucked into the pump or jamming the fire hose - Nozzles. To operate these pumps, simply use a Momentary - Off/On Switch, controlled by a Servo. And for more realism, you can use a 2nd Servo, to move the Nozzle = Left & Right, as its shooting water. Here also, you might use a model boats - rudder servo, for example, to also provide the swing = L/R movements, while its held by a crewman - for example. Cost of the pumps & filter and any other parts, will vary some, but usually don't go much above $20.00 - FOR THE Entire Setup! Fire Monitor's! Tap Photos to Enlarge
__________________________________________________________________________
R/C Sound Effects! If done properly with some imagination, this ideas sorta like having S-E-X .... "And should leave you = Sputter & Smoking = Like A Diesel Engine!" Sadly however, we don't have many sources to choose from. Or sound effects systems and electronic r/c sources from which we can purchase such things in our hobby. But I'm sure you've likely heard and/or seen models using one or another of these ideas. Maybe even tried using your own tape player or portable tape records/player inside a model - for this idea, which even I've tried and it Works. And here, you might even remove the audio effects from toys - for example, and use them in a scale model too. So there's lots of ideas on how to go about this, but its mainly up to you to figure out your options. Oh Yeah - there's also the new "Burn-In Memory Chips" and circuitry now available that you just plug-in, download the sound into the chip ( Called Burning its Chip - Memory ), then install it into the model. These usually must be triggered by a radio finction switch or else turned on by you. Recording your own Sound Effects ..... Question? .... Does your PC have "Audio Spftware?" Most have some sort of audio software on them, but some also have additional capabilities, you may have not considered worth checking out - Until Now. Take for example software called 'SOUND BLASTER", which is an audio file software that many pc's - use today. Its got all sorts of neat little audio recording devices installed into the program, and usually people don't even know-it. Or they just don't think about it, until something like this idea comes to mind. "So first - check you pc to see what software it has, you may have everything you need to create your own sound effects and record them onto a models - sound effects circuit and use them. And there are a few new sources - beginning to appear in the hobby market. .... But the most often used systems come from: EA Electronics or Ram R/C Sounds and ROBBE R/C Below, are a few "Audio Sounds or "Wav Files" as their called, which I use in some of my own models from time to time. These can be played using a small battery powered = Cassette tape player mounted in your model, activated = via a "Servo connected to an Off/On push switch, that turns the tape player = On & Off. You can also use sounds from other sources - like Vhs tapes or portable cassette recorders, to record whatever sounds - you want to use. Then enhance or cut and arrange them on your pc, with your sound software to make just about any sound effect you want. Then download the sound on a new cassette tape, or install it in your model boats - memory chip operated sound effect system and your done.
Real Horn - Sound Effects! "Diesel & Steam" You can "Download" using Windows Media Player Or Real One Player if you have the program installed on your PC. If you don't have one of them, you can download either of these software - FREE! CNET- also offers the same software downloads = For Free too. Once the software is setup on your pc, just tap any below "Speaker Icon'" to download and listen to that particular audio file. Or to save it to your PC ( If You Like ), these sounds are FREE, but may take several minuets to download, depending on your internet connection speed. .... Compliments of Old River Bill Zumwalt
More Info. on Model - Sound Effects Systems! RAM SOUND EFFECTS SYSTEMS, from "Ralph Warner" ... If you want more info on his fine audio sound systems. He has many different types of audio or Special Effects items, that include Nav. Lights and many others for scale models. Contact Ralph by snail mail: at "Ram Radio Control Models Inc." 229 East Rollins Rd., Round Lake Beach, Illinois 60073 Or Phone him at ( 847 ) 740-8726 or, by Fax at ( 847 ) 740-8727 Ralph has systems that work in all kinds of Models and Boats & Ships, plus R/C Cars and Trucks, as well as R/C Airplanes too. NOTE - I use Ralph's - Model #40 unit, which creates either a Gas or Diesel - Engine Sound, that mimic's a small "Detroit Diesel" or a big Block = V8 engine. Its sounds are varied from "Idle to Full Speed", connected to the dc motor of your boat. And the circuit also provides an adjustable = Horn sound too. ____________________________________________________________
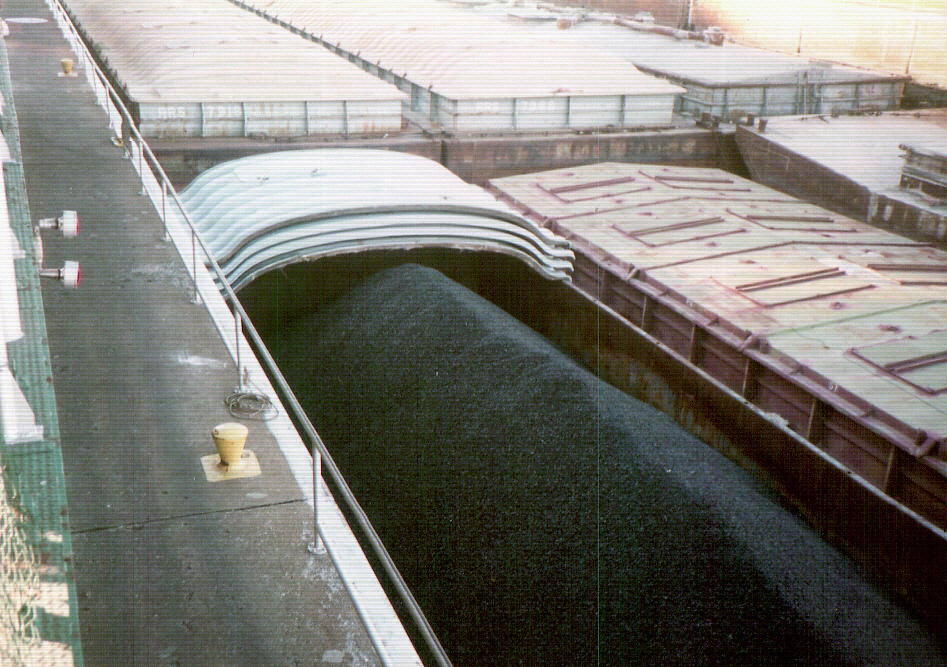
Make Removable - CARGO for Hopper Barges Coal, Grain, Rock, Sand, Gravel & Scrap Iron! Tap Photo / Drawing to Enlarge
2nd Method = for Making a Coal Load for Barges. In the same above Drawing ( Note the Two Bottom - Diagrams ), where you'll see how a this idea is used. First, you must have a large cake pan, that you can mix with a 50/50 mixture of "Elmer's White Glue" and Warm Water. Then use common "Kitty Litter, or Finely Sifted = SAND" ... depending upon the material load desired and mix it into the Water/Glue Mixture. Once fully mixed together, it should be thick and pasty - like, and then poured over a "Cardboard Mold" that's given similar shapes to the Foam - Coal Load. In Fact, you could use a Foam Rubber - Pad, under layers of "Wax Paper" or Glad Wrap" separate the Load - From its mold. The mold itself as well as the interior of the "Cargo Box", must be covered with "Wax Paper" or Glad Wrap too, so they don't become part of the barge, unless you want this to happen. Pour Slowly, so it doesn't run to much, and don't use to much water, or the mix will be runny. But to little water & Glue, makes it hard and the mix will be to sticky, so practice - 1st. Before you try a making a molded - load inside a Barges = Cargo Box Once the mixture dries a day or two, pull the mold out of the barge, and remove the wax paper / Glad Wrap and clean the barge. You've now - formed a cargo load or plug mold, and once its sanded & finally shaped, so it fits properly in the barge, its ready to be spray painted = Gloss Black = so it represents Coal. NOTE!....... This could also represent loads of "White Rock & Stone", also called = Rip Rap, if applied to a "Flat Deck" - Barge, for example. And could even be used to hide = extra batteries or sound effects on a model or barge. Here also, a few broken pieces of foam, dirt and glue, poured over the mold would look like - Huge Boulders or Broken Concrete. Other covered loads in barges, might represent - White Fertilizer by using "Flat White - spray paint. And a load of = Rock SALT, or Road Salt like the highway departments use on our Highways in Winter Months, could be made with Foam and "Gloss White" Spray Paint, as another option example.+ ____________________________________________________________
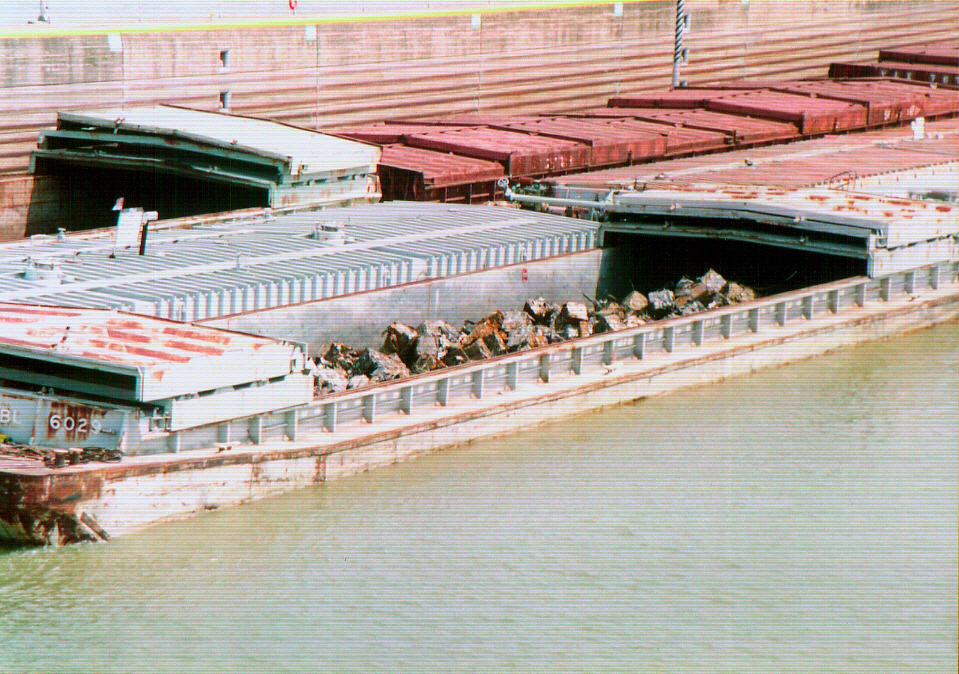
How Bout a Barge - Loaded with CRUSHED AUTOS & JUNK? Tap Photo to Enlarge
And then I added a few Plastic Auto Parts, from model car kits, laid random on the load, to look even more realistic. I have a few left-over auto parts, Wheel Rims, Exhaust Mufflers - Etc, left from some of my past modeling of plastic car and truck kits, so I thought - WHAT THE HECK? And then sprayed them with a rusty mixture of colors to represent - SCRAP METAL. this idea really took off. And I also allowed some of the foil bales, to carry their - own shine, to indicate old Chrome or burnt & dirty looking materials. The only hassle to all of this, is setting for hours, rolling those damned little cubes of foil, into "Metal Bales!" Then placing them onto the mold, after they are dabbed with CA Glue, and installed. It took a while to fill one hopper barge, even with the foam block under the bales to increase their mass, as a false removable load. Oh Yeah, don't forget to use your scissors to cut up a few Fenders, Hoods and Grills too Just as additional details, making things look even more - Realistic..... NEAT IDEA - HUH! ____________________________________________________________
Making - Canvas Tarps & Covers Tap Drawing to Enlarge It
Example, lets say the item = is a Life Boat! Gently shape the tissues so they wrap around it - lust like a folded Tarp would, if a crewman had covered it. Tucking in the sides and corners - Neatly, then once fitted and positioned prperly, trim-off the excess material with scissors and do the final fitting of the tarps - general shape, over its covered subject. You may want to add "Tie down" ropes or lines ( if desired ) too, using a "Needle & Black Nylon Thread" to install the ropes as hold down straps on your new tarp. Just install them before the tissue dries out = completely. And once the tarp has fully dried after a few hours, or over night, paint the tarp cover, with just about any "Flat Color" desired = Green, Brown, Blue or Flat White and your tarp is finished!!!! "Oh Yeah, I almost forgot ... "If the object to be covered by the Tarp, is left = Partly Exposed ..... It shows some of the objects own details, while its under the tarp, and looks even - More Realistic. Kinda Like a crewman hasn't - finished his job, and left things partly uncovered,= so you see can the object under the tarp...... NEAT IDEA HUH! ____________________________________________________________
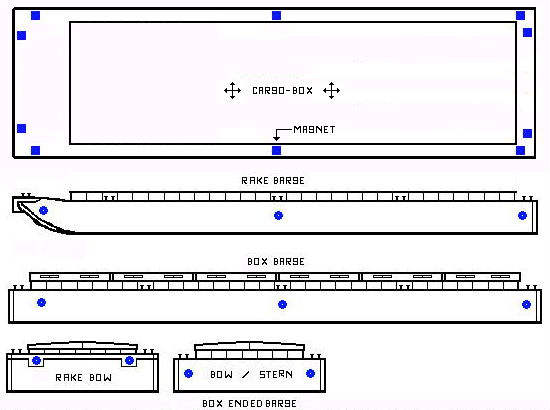
Building Multiple - Barges that couple Together - Using Magnets! (( Requires A Total Of = 10 Rare Earth Magnets - Per Barge )) This idea is simple too, especially when scratch building barges and you want to save time when assembling the tow = multiple barges. The barges will stay tightly - together, even on windy days, yet easily break apart, if you want to rearrange them. Saving time and reducing the need for String or "Rubber Bands" as cable or lines used to normally hold scale barges - together. And if someone ever produces "Vac-U-Formed" Barges, this idea is really going to take off! .....HINT- HINT = Phil Pace Over At Vac-U-Boat!! Tap Drawing to Enlarge It
I'm going to assume your using = 1/8" or 1/4" plywood ( for Example ), to build all of your barges, meaning their = Bottoms, Sides, Ends & Deck. And I'm also going to assume your barges are going to be fully - fiberglass covered, to make them waterproof. Ok, here we go = 1st, you'll need about = 10 Rare Earth = MAGNETS, per barge. Which will be installed into "Pre-drilled Holes" in each barges hull, sides and ends. The magnets must be positioned properly, so they will connect with the other barges ( Note = Pay Close Attention To Magnet - Polarity! ), and mount them using small amounts of epoxy glue into their holes. Follow my drawing for installing the magnets into your barge, making sure the holes - aren't drilled - completely through the plywood. You want a thin layer of wood between them, when the barges are being pulled together, by the Magnets, So leave at least an 1/16" of wood covering where their holes are located on the hull ..... In Other Words, "Counter-Sink" the magnet-holes, on the Inside of each barge, before its assembled. Regardless of the type barge being built = Hopper / Tanker / Flat-Deck - Etc, the positions of the magnets needs to be exact. So you don't have to worry about any barge - coming apart or assembling things - in a certain pattern. That way, you can place any barge, anywhere you want and make up a tow, at random, with your barges positioned - anyway you like. And as you build the barge( 's ) inner Cargo Box area's - if its a hopper barge = for example, the magnets are hidden by the cargo box = walls, and under the barge decks and completely out of sight. And once your at the Pond ... Simply put each barges into the water ( One Against Another ) and the Magnets will lock them tightly together. This makes things a whole lot easier in scale barge towing and saves time for more fun, with the boats! ____________________________________________________________
Another easy project for model boats, that brings more realism - to the model. And it doesn't have to be a fancy. For an example, you could use an old worn Servo = its gear drive, to operate the radar, which is perfect for this. All that's required is an old worn out - servo, which the electronics have been removed, leaving only the motor & drive inside the servo case. Be sure to remove the Pot and its Stop Travel - Pin, from the servo shaft - output too. So the motor can run the drive in 360 degree turns!
Tap Photo To Enlarge
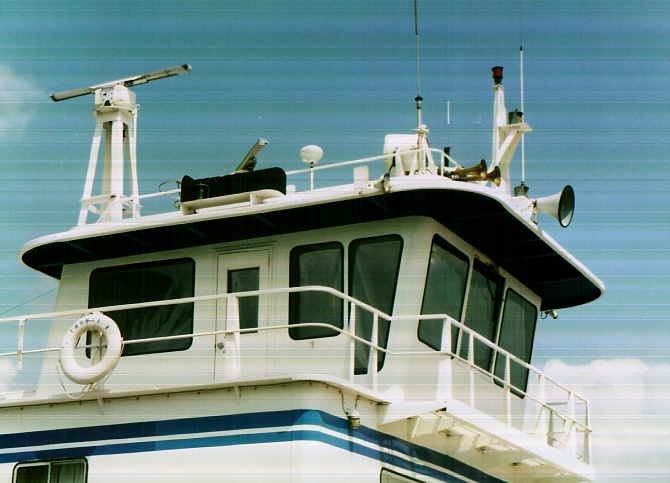
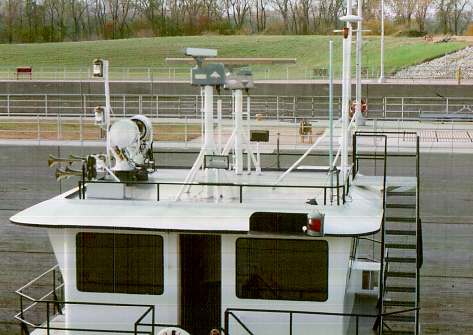
Making a models - helm "Radar Screen", look like = Its Working...... And Its Easy. Just use a small "Flashing" LED, or "Small - Flashing" Light Bulb, mounted inside the radar cabinet. Then add a piece of Blue or Green color - Plastic Film Screen over the Radar - as the Picture Tube. So the flashing effect reflect on the screen, like a radar pattern is being displayed. The drawing above shows a pretty good example of how this works, when a simple pattern is drawn on the back of the radar - screen. This example depicts a roof or ceiling - mounted radar screen. So it will flash the pattern on the screen, which can be seen by admirers - looking at the helm details - under low light conditions. The Screen Pattern can be drawn on old exposed camera film and represent the radars - screen or picture tube! Or you could use dark = photo film, then use a chemical to trace a pattern on it, then mount it behind a decal, that looks like the front panel, of the Radar. Either way. you get the same effect and its really neat looking and realistic in a scale model. Examples of Radar Systems on Towboats Tap Photo to Enlarge
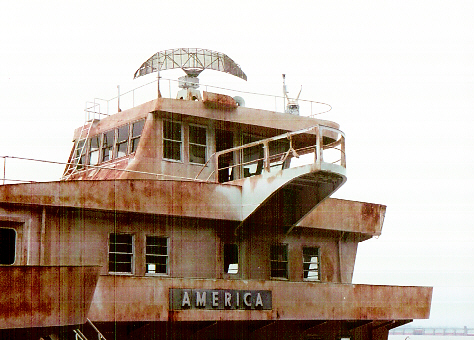
( Photos By Old River Bill ) L to R Photo Details.... 1st Photo = A newer Dravo Vessel - version of their "Radar Mountings", using Foruno Radar Systems, 2nd Photo = An 1950's era "Motorola Radar" on a tower mounting, of an older St. Louis Ship designed - Towboat. 3rd Photo = A newer St. Louis Ship - Radar Mounting, using "Foruno" Radar systems, mounted simply on a vertical pipe - tower. NOTE...... The support that the radar is mounted upon, is called a radar = mast, or tower. And can be just about any height, depending upon restrictions. like bridges - for example, during high water conditions. Generally towboats have short towers or pipe mounting systems on them, due to such worries. But each builder and owner, has their own style or method of mounting the radar. _______________________________________________________________
Last Updated
On 06/29/23 .
With
|
 (No Link, Sorry)
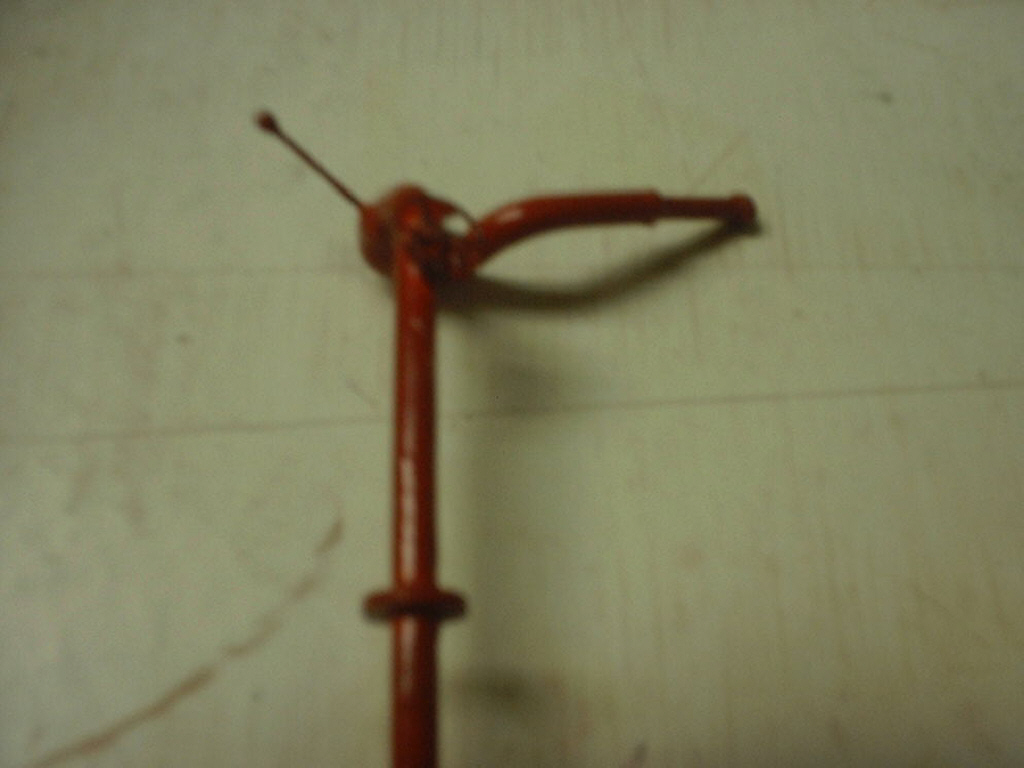
 Example Drawing ... Older Radar System, used on Vessels
of all kinds, from the 50's to late 1960's. Using a simple - Pipe Mast
of several feet in height to brace the Radar - Drive Turret.
Example Drawing ... Older Radar System, used on Vessels
of all kinds, from the 50's to late 1960's. Using a simple - Pipe Mast
of several feet in height to brace the Radar - Drive Turret. Example of .. Newer Radar Systems, used today, mounted
atop a 4 - legged Mast. Can be a short version as this drawing shows,
or a much taller version!
Example of .. Newer Radar Systems, used today, mounted
atop a 4 - legged Mast. Can be a short version as this drawing shows,
or a much taller version!  Example of a Homemade - Radar Drive, using a gutted
"Servo" - as the Radar Drive.
Example of a Homemade - Radar Drive, using a gutted
"Servo" - as the Radar Drive.

 TM
TM