|
|

|
Hand Made - Fittings ....Are Easy! And You don't need - a Metal Lathe Or Milling Machine, "But If You Got One - Their Sure Nice!"
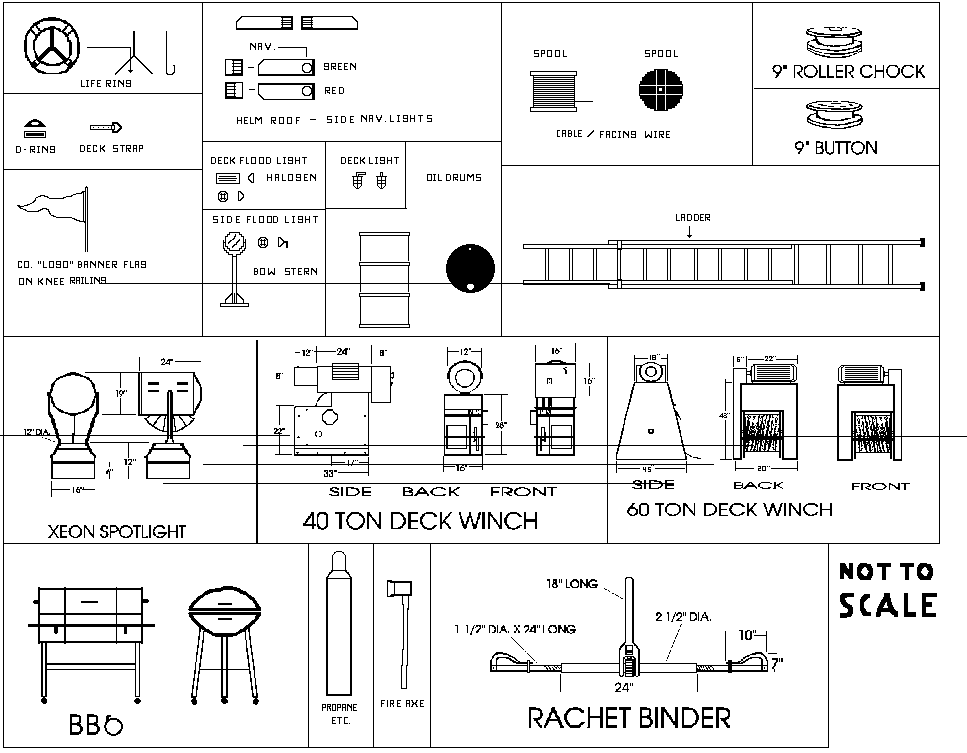
_________________________________________________________________________ Hand Carving - Parts using an Electric Drill ... Bench - Vice & Dremel Tool and Bitts! Scratch Building parts = Air Horns, Bitts, D-Rings, Buttons & Roller Chocks - for Barges & Workboats and Other Models. Whether made from Wood, Plastic, or Metal, you can carve parts and fittings - like these, learning to shape them to scale sizes, with some patience and practice. Basic Tools - Needed = Bench Vice & Work Table, Hobby Saw, Or Dremel Tool & Cutting Wheels and Bitts, Electric - Hand Drill, Sandpaper and Xacto Knife. Or a Shop Wood turning - Lath, to turn parts of any size, with carving tools. Materials = Plastic / Wood & Metal materials in varied sizes = Rods / Tubing & Dowel wood, plus some Plastruct materials in various shapes = L's / Angles / C -Channel & I-Beam Stock. Examples of - Bitts, Chocks, Kevels, D-Rings & More! Tap Drawing To Enlarge
_________________________________________________________________________
Working - Deck Winches This diagram shows - two methods, of making a Deck Winch - actually Work. Increasing the interesting details on a model, when you flip a switch, and the winch slowly - tightens up those loose lines!" Usually the first comment from onlookers, is something like - "How The Hell Didja = Do Dat?" Tap Drawing to Enlarge
NOTE - On some large - Towboats, there may be as many as 6 to 8 different - Deck Winches. So you may have to make several different types of Deck Winches, to insure the model is true in every detail. And sometimes boats use combinations of "Hand Operated" winches, along with Electric or Electric / Hydraulic - versions of winch systems. _________________________________________________________________________
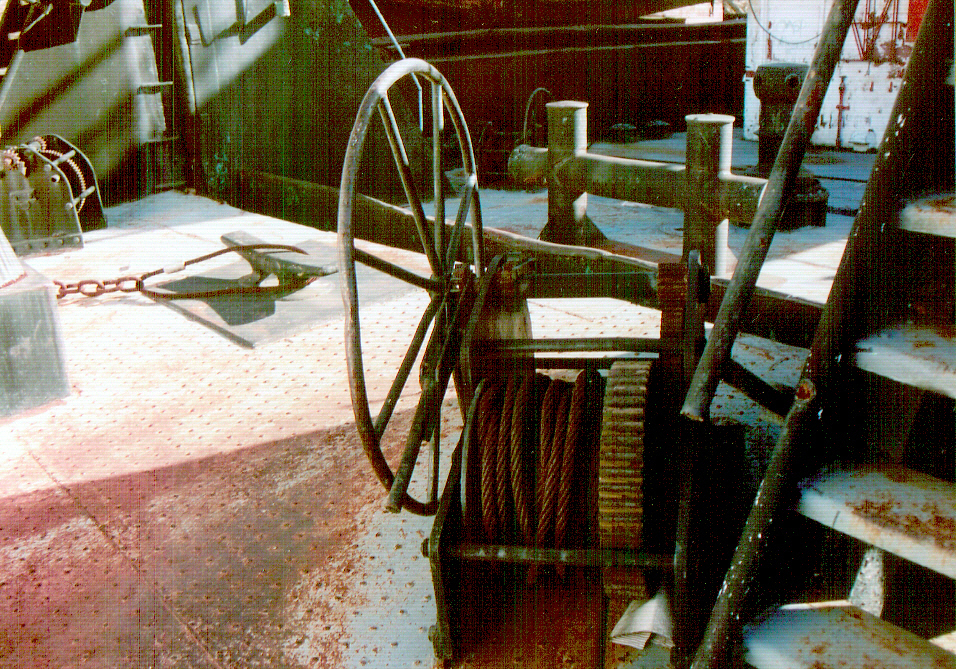
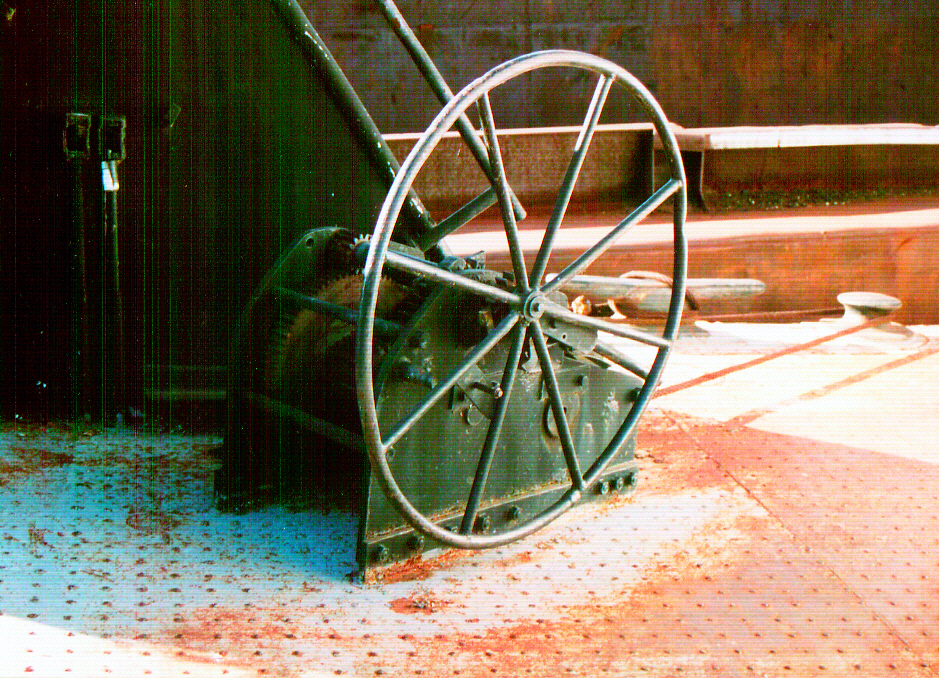
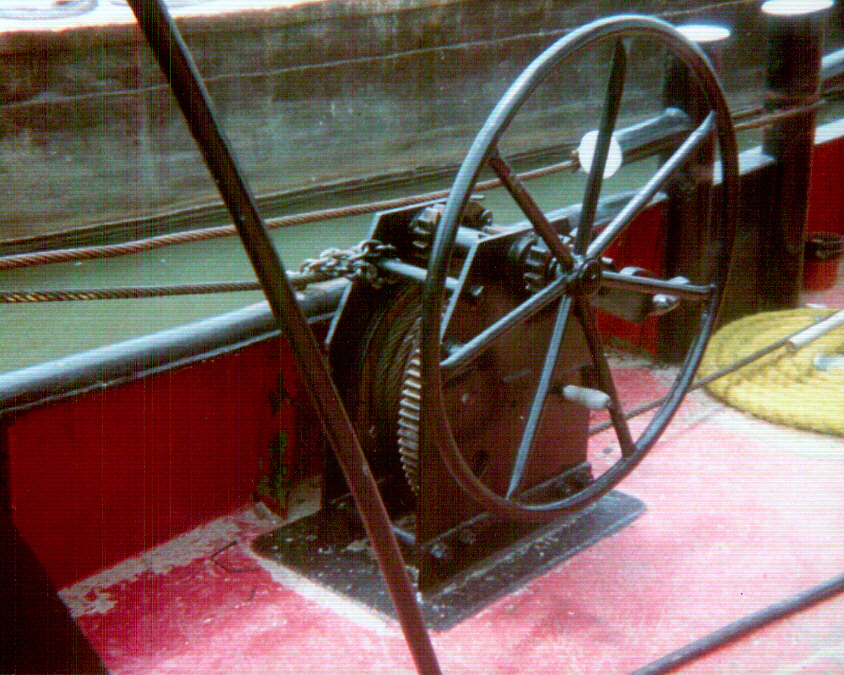
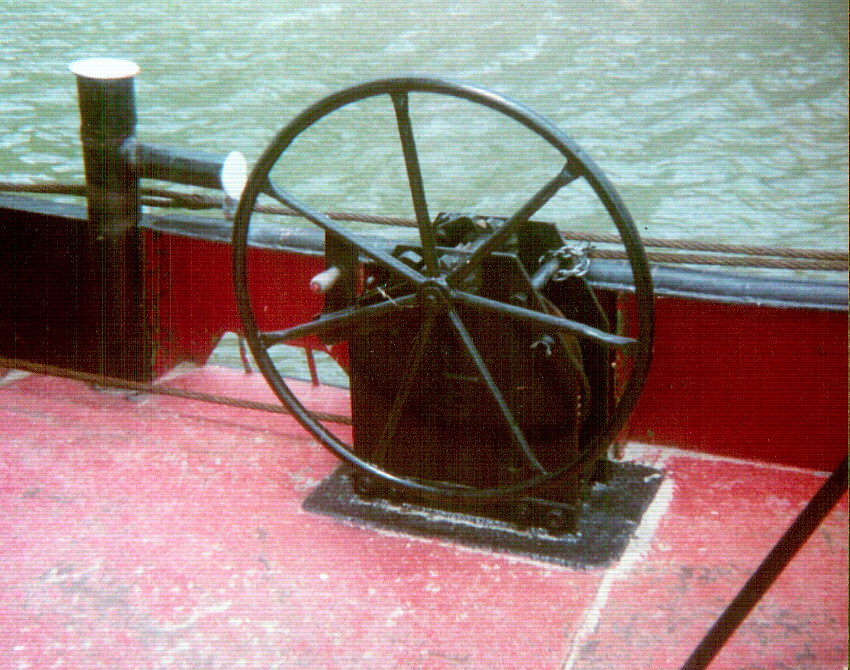
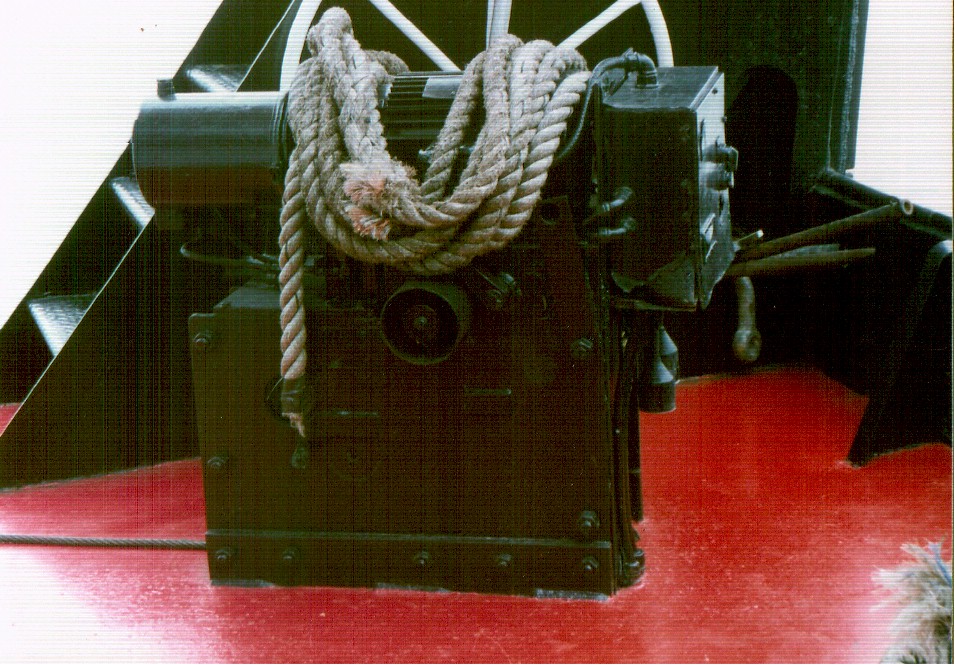
Two Types of "Hand Operated" - Winches used on Towboats & Barges too! Depending on required scale - which these are built, you may find the "Hand Wheel" is easily obtained from parts left over from some past "HO - Model Railroad project" or from some Lionel or Garden - Scale parts? Here also, some model boat fittings parts suppliers, may offer the correct scale - Hand Wheel, for your to add - in building these for a model boat or barge. Tap Photos to Enlarge
_________________________________________________________________________
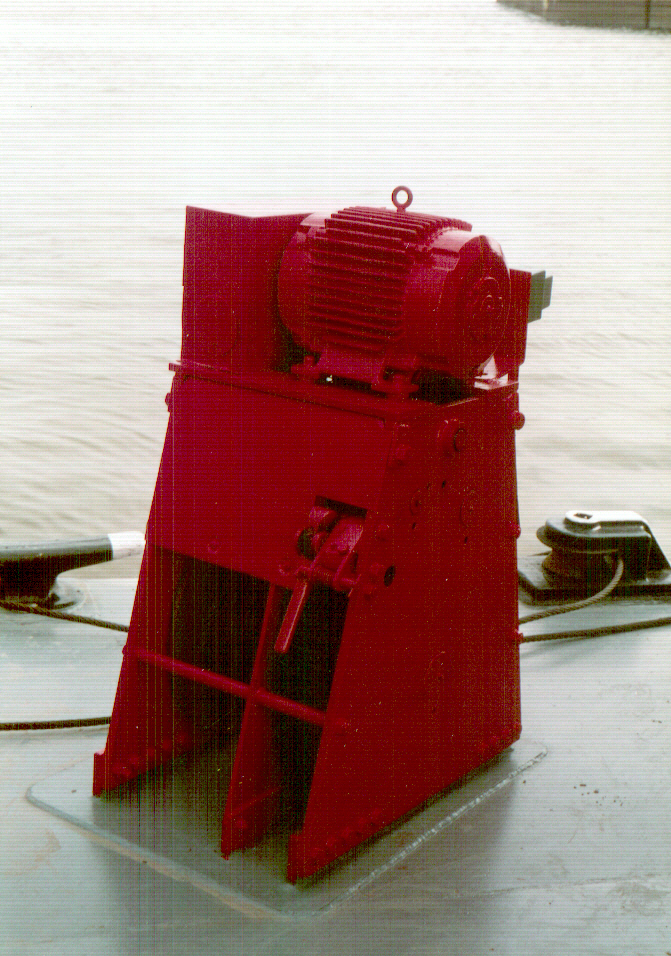
The Electric Powered - Deck Winch Tap Photos to Enlarge
Colors commonly used on winches, are BLACK & RED. But on Barges, they can be pained the same color as the decks, so take note of this in your detailing. I've also seen the Wheel Control - of the winch, painted bright "Yellow" and danger or cauton yellow or white painted lines around the winch on the deck. These painted caution lines, just indicate to crewmen, where they should avoid walking, whenever the winch is in operation, or its lines are taught for safety. _________________________________________________________________________
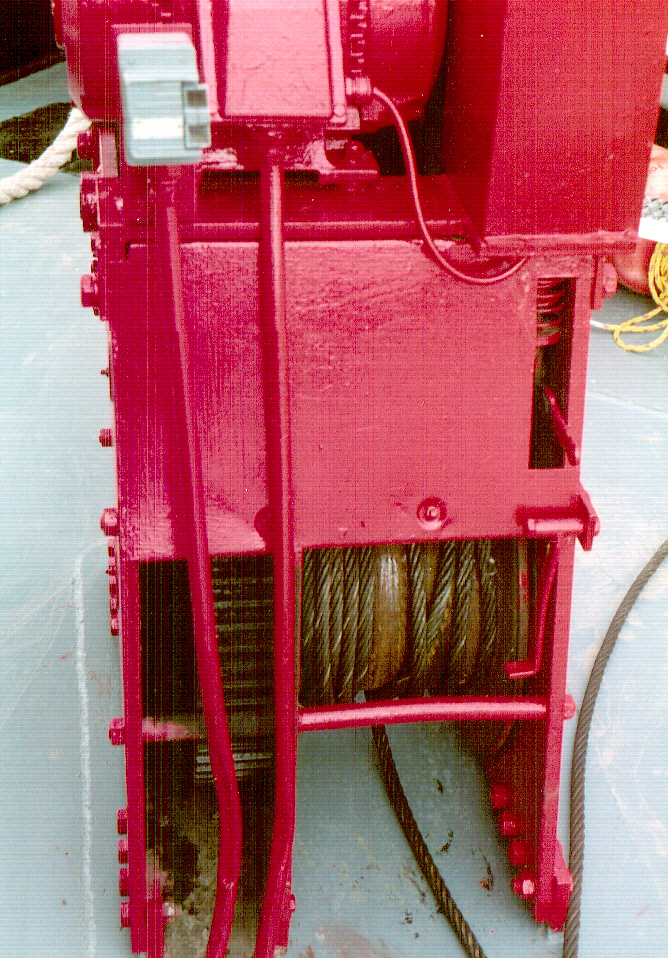
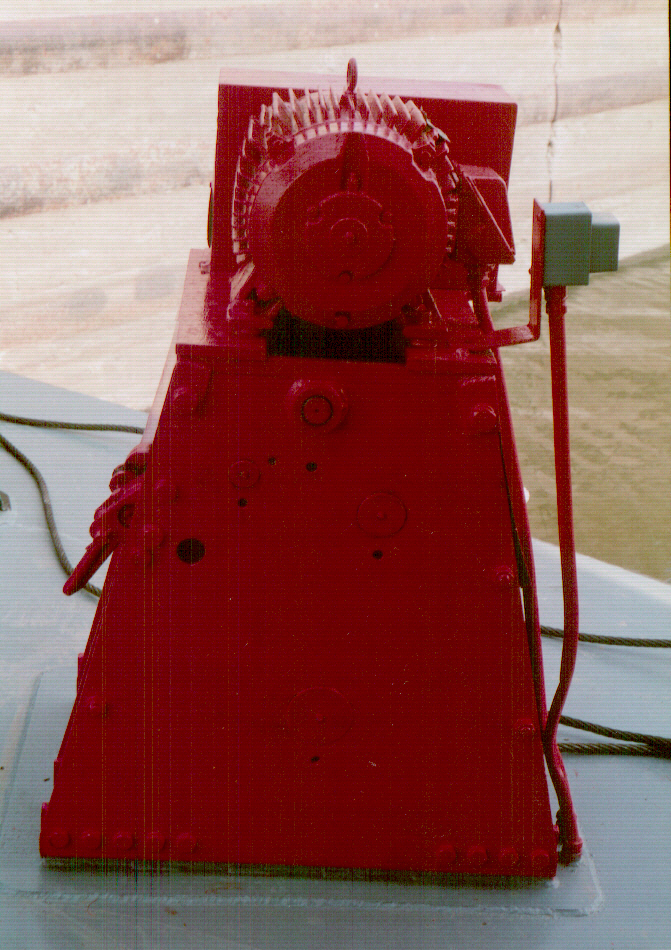
The Hydraulic / Electric Powered - Deck Winch Tap Photo to Enlarge
Generally, Small boats use electric powered = Deck Winches, and larger boats use these Hydraulic / Electric - versions, but occasionally you even find them on small towboats like the Tender, harbor or Trip Boat - for example. Their very powerful, probably the most powerful system available for such small units, so their use is commonplace on many types of vessels - even self propelled barges - Sometimes! _________________________________________________________________________
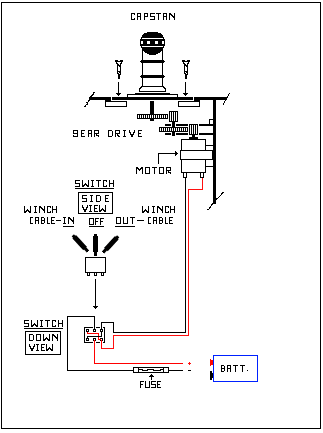
Make A Working - Capstan Winch Or this idea can be used for a "Gear Drive" for Models, like Cranes & Lifeboat - Booms & Sail Winches too Gear Ratio's used & Types of Gears chosen are optional to the builder! Tap Drawing to Enlarge
Special Notes ..... This simple system could be enlarged in numbers of gears, to make this a system for a Working - Deck Crane's, needed Boom & Cable Drives too. Which could be easily operated via R/C - if you desired, making a very neat looking - Operational Crane with its own effects. The system depending upon needs for the Crane, would operate the Cab, swing it Left or Right, or the raise or lower - the Boom, or feed the Boom Cables - In or Out. Depending on how realistic you wanted make the model crane operate! I'll Add More - Later, so check back Often _______________________________________________________________
Last Updated
On 06/29/23 .
With
|
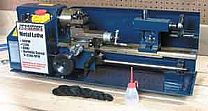 However mine is the 7" x 10" Mini - Lathe from
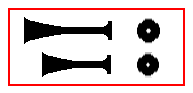

 If you can insert a short strip of
dowel wood or plastic rod into a drill chuck, tighten it down and pull
the trigger .... "You can make rather neat looking fittings!" For
example, lets say you need a set of "AIR HORNS" .... Just carve
their shapes into the material, mounted into your drill - chuck, by
using a "Dremel Tool" and Dremel Bitts to shape it. While its clamped
in the drill and the drill is clamped in your bench vice, you can slowly
shape the parts needed, using sandpaper to finish them after their cut
to shapes needed. And take advantage of the many bitts that come with
a "Dremel Tool" also, they easily shape small parts with some
practice. Copy or save these
drawings and build them - in whatever scale you may need, by enlarging
them on your pc & printer .... compliments of Old River - Bill!
If you can insert a short strip of
dowel wood or plastic rod into a drill chuck, tighten it down and pull
the trigger .... "You can make rather neat looking fittings!" For
example, lets say you need a set of "AIR HORNS" .... Just carve
their shapes into the material, mounted into your drill - chuck, by
using a "Dremel Tool" and Dremel Bitts to shape it. While its clamped
in the drill and the drill is clamped in your bench vice, you can slowly
shape the parts needed, using sandpaper to finish them after their cut
to shapes needed. And take advantage of the many bitts that come with
a "Dremel Tool" also, they easily shape small parts with some
practice. Copy or save these
drawings and build them - in whatever scale you may need, by enlarging
them on your pc & printer .... compliments of Old River - Bill!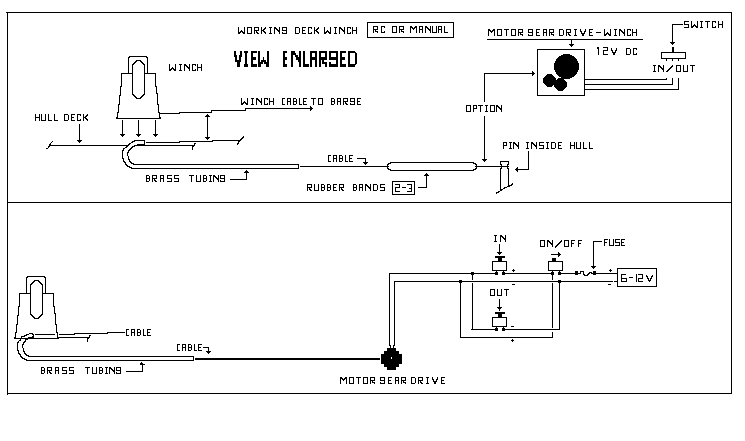
 TM
TM