|
|

|
Making Styrofoam Hulls! Using Styrofoam = Blocks & Sheets ( Any Color Or Type Of Block Foam ) Advantages Of Foam Hulls = Very Tough ... Sink Proof ... And The Fastest Built - Hull .... And Cheapest! _________________________________________________________ Building a "Styrofoam Core - Hull" - isn't difficult, so relax! ..... And begin making yourself a homemade version of a "Hot Wire" - Foam Cutter. Or purchase one, from a "Model Railroad Hobby Shop", or other Hobby Supply Sources. Model Railroader's use these things for cutting = Foam blocks & sheets to make layouts = Mountains & Scenery. And to build a "Homemade" version, tap my - above "Homemade Tools" Page button, cause I've included instructions & details on making one of these things - on that page. And once you've copied or printed out = the info on making it, return to this page and see how - I use mine to carve foam out a hull - Also Fully Explained = Below! Tap Drawing to Enlarge
Adjusting Hull - Side .... Don't get excited - This is very Simple! .... "Lets say - you've chosen 1/8" thick balsa or Plywood to cover your "Foam Hull" And you have to cover the foam - with wood, meaning both = Sides, Top, Bottom & Ends. And you have to cut things, so the hull is exact scale size and lets say - its gotta depict a 40' W. x 80' L. x 12' draft vessel, for example. In 1/4" = 1 foot scale, that means the hull will measure ( when finished - sheeted with plywood and fiberglass covered ), 10" W. x 20" L. x 3" Draft. So you sure can't just start out, by cutting the hull - exactly 10" wide and 20' long or 3" deep - In Size, Now Can You? Otherwise the hull would be oversized, when you added the wood and resin finish - RIGHT. So that means you have to remove 1/8" = OFF all the foam blocks = sides, ends, top and bottom, so the wood and finish will bring its size, back to the proper sizes. And it also means you need to allow, just a little extra for the fiberglass resins too. "Lets say a 1/16" overall, meaning you have to adjust or remove approx. 3/16" from the Balsa Template, you will make of the hulls sides. Once the two side templates allow for these removed amounts of material, the templates can be applied to the foam block for carving the hull. And once its carved, the hull needs very little additional adjustments to be ready to fully cover with balsa sheeting - overall. NOTE ..... These two adjustments, to both the foam block, and its two side - wooden templates, insures the finished covered hull will be exact in scale - as I said. "So these things are critical and must be done before your ready to use the Hot Wire to carve anything. And you can apply the templates to the foam core, using thin - strands of Hot Melt - Glue, with a glue gun, but just don't let the glue get to hot. Here the trick is to apply the glue to the wood - First, then press the material against the foam and hold firmly for a few seconds to allow it to cool. Using the Hot Wire Knife - Bow, turn on the power supply, set to its lowest range = 0 voltage, then slowly increase the voltage till the wire begins to - SMOKE. Note the voltage setting in memory, and try the bow on a scrap piece of foam block, it should pull slowly and slightly stretch the wire taught, as it cuts the foam. "If it stops cutting, increase the voltage on the power supply, till the bow - pulls smoothly through the foam, then remember the voltage setting!" .... REMEMBER, never go to a higher than needed to cut the foam, it can burn the wire apart and make it - coil back and burn you! When ready to cut the foam hull, simply lay the bow across the templates, and follow its shape with a gentle pull. Follow the lines of the templates - pulling slowly with a steady pull - towards you, as the hot wire cuts away the excess foam.... ( SEE NEXT STEP BELOW ) Tap Drawing to Enlarge
NOTE - This tool is used to carve out - tight spots on hulls, like the stern - Tunnel Hull Area. Spooning the foam out, to create the Tunnel Stern sections, before the woods and finish, are applied over the foam core of the hull. Working with the Hand Wand, does take a little practice, but its easier to shape foam, than you might think. Just be sure to let the wire - cool off - before reshaping it to do more carving! _________________________________________________________
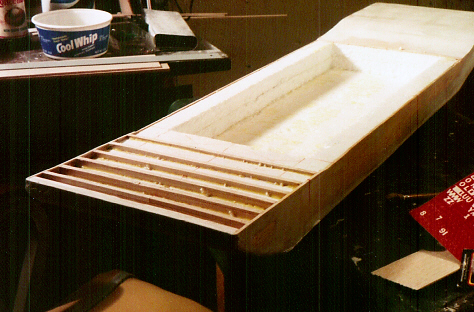
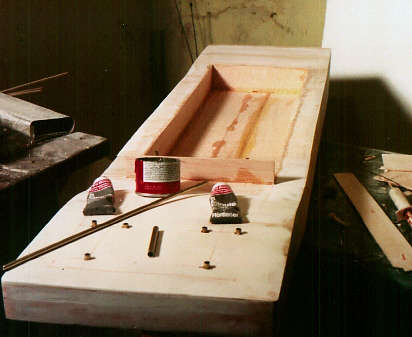
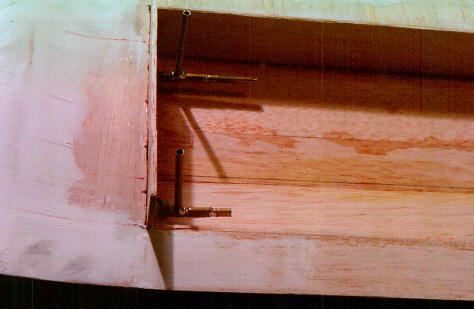
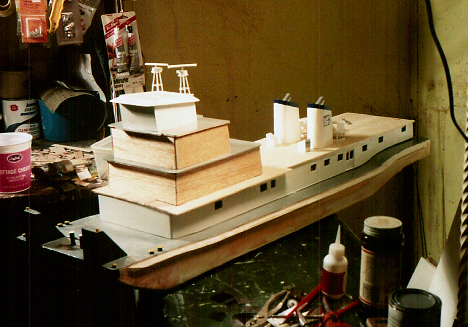
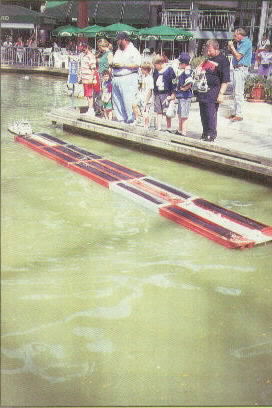
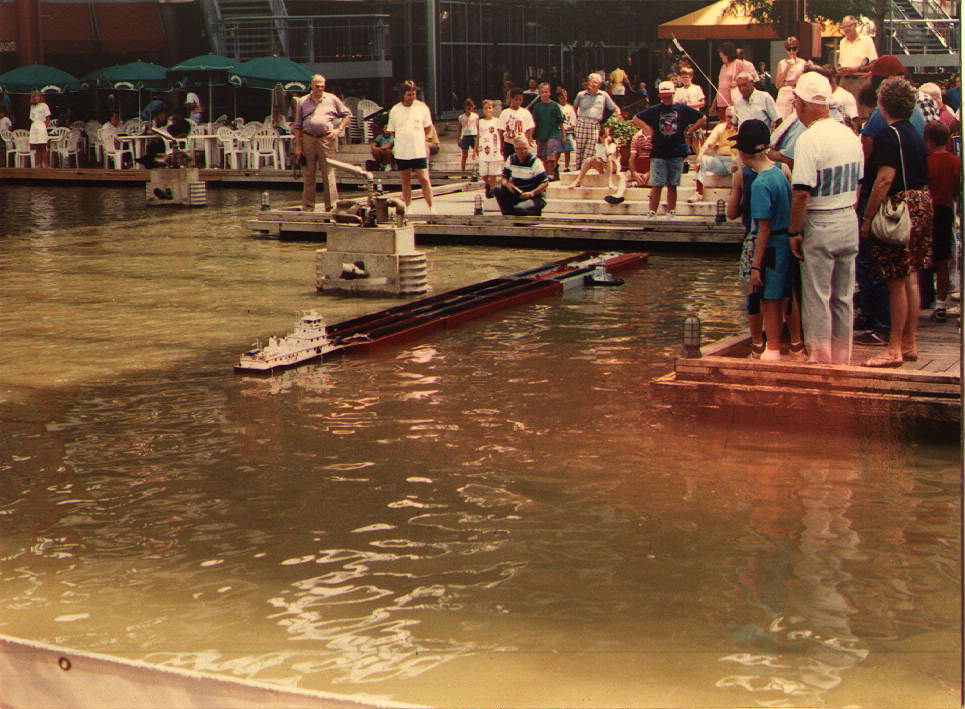
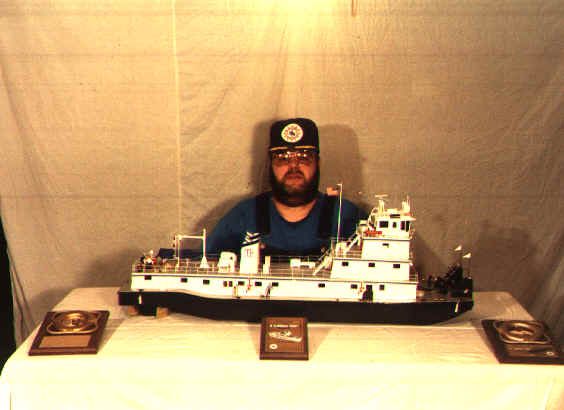
Building Hull - Examples The Thomas K. Built with a Styrofoam Core = Hull Materials used, were 1" thick sheets of House Insulation Foam = White, layered together to create the hull block. Then applying the hulls - Side Profiles, as wooden Templates, the hull was carved out, then sanded and final shaping was done. Using the "Hand Wand" to carve out the hulls - Tunnel Stern profiles, before the foam core was sheeted with 1/8" balsa wood. And finally given several coats of polyester resins, over a layer of 4 to 6 Oz. fiberglass cloth., sanded between coats, then painted. Fiberglass Cloth .... If you can't find "fiberglass Cloth" at your local hobby store, or hobby supply source. Try the local - Auto Body Shop and Auto Parts, ask them for a small amount of the thinnest material - they may have. It should be about 2 to 4 Oz cloth, and allow you to clearly - SEE THROUGH THE MATERIAL, almost like a White = Silk Scarf. Or you can try SILK - for that matter, by shopping for such materials at cloth stores, asking for their FINE MESH materials or Silks & Nylon - See Through Cloth materials. Who knows, what's you might discover, until you give it a try with a small piece and see what happens? Fiberglass Resin.... They make several types of Resin - Fiberglass, Polyester, as well as Marine grades & Others. Its a thick clear material, similar to "Polyurethane" but must have a "Hardener Agent" added to it, before it will harden. The cheapest versions - I've found, can be purchased usually at any WalMart Store, called - BONDO, from the Automotive department. And it takes only a few dozen drop - of hardener in an ounce of resin, to be ready to apply. And you usually have about 15 minuets, before the stuff starts to set-up, to work with it. And most all brands work about the same, but don't try mixing two brands of materials, it often doesn't mix or setup, and all must be applied over a cloth in order to bond to the hull or whatever your covering. NOTE!! .... Must be given several coats of resin & Hardener over a single layer of cloth, then must be sanded - between each coat to adhere the coated layers, together before finish paints can be applied. Tap Photo to Enlarge
Tap Photo to Enlarge
Tap Photo to Enlarge
Tap Photo to Enlarge
Tap Photo to Enlarge
Tap Photo to Enlarge
_______________________________________________________________
Last Updated
On 06/29/23 .
With
|


 TM
TM